germans
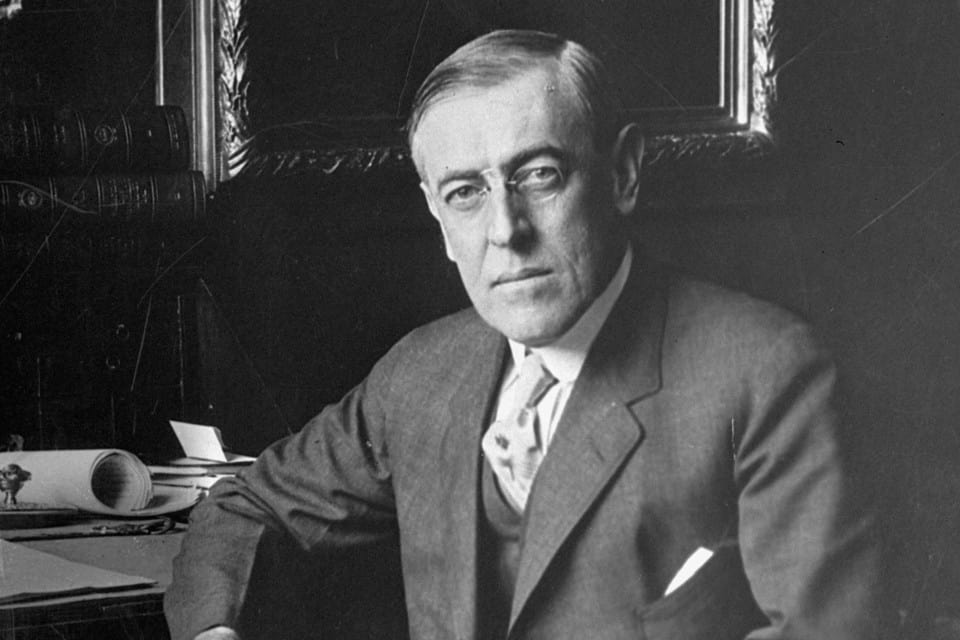
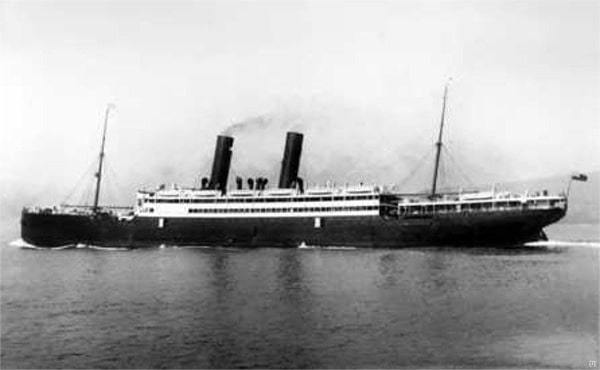 The SS California, owned by Anchor Line Steamship Company; a Scottish merchant shipping company that was founded in 1855 and dissolved in 1980; departed New York on January 29, 1917, bound for Glasgow, Scotland, with 205 passengers and crewmembers on board. While the trip should have been a pleasant journey, world events would soon happen that would change everything in an instant. On February 3, 1917, United States President Woodrow Wilson gave a speech in which he “broke diplomatic relations with Germany and warned that war would follow if American interests at sea were again assaulted.” Of course, all ship sailing the seas, especially those departing or arriving in the United States, or any that had US passengers were warned about the possibility of a German attack.
February 7, 1917, found the SS California some 38 miles off the coast of Fastnet, Ireland, when the ship’s captain, John Henderson, spotted a submarine off his ship’s port side at a little after 9am. I can only imagine the sinking feeling the captain must have felt at that moment. The Germans were not known for any kind of compassion, and they didn’t particularly care if this was a passenger ship. They figured that the ship might be carrying weapons, and they actually might have been. Captain Henderson ordered the gunner at the stern of the ship to fire in defense, if necessary. Unfortunately, there would not be time to do so, because moments later and without warning, the submarine fired two torpedoes at the ship. The first torpedo missed, but the second torpedo exploded into the port side of the steamer, killing five people instantly. The explosion of that torpedo was so violent and devastating that it caused the 470-foot, 9,000-ton steamer to sink just nine minutes later. The crew quickly sent desperate S.O.S. calls, but the best they could hope for was a hasty arrival of rescue ships. Time was simply not on their side, as 38 people drowned after the initial explosion, and with the initial 5 who died when the torpedo impacted the ship, a total of 43 died. It was an act of war by the Germans.
 The Germans were known for this type of blatant attack, in complete defiance of Wilson’s warnings. It’s almost as if they were simply crazed with hatred. Because of Wilson’s warnings about the consequences of unrestricted submarine warfare and the subsequent discovery and release of the Zimmermann telegram, the Germans reached out to the foreign minister to the Mexican government involving a possible Mexican-German alliance in the event of a war between Germany and the United States. That caused Wilson and the United States to take the final steps towards war. On April 2, 1917, Wilson delivered his war message before Congress. It was this action that brought about the United States’ entrance into the First World War, which came about just four days later.
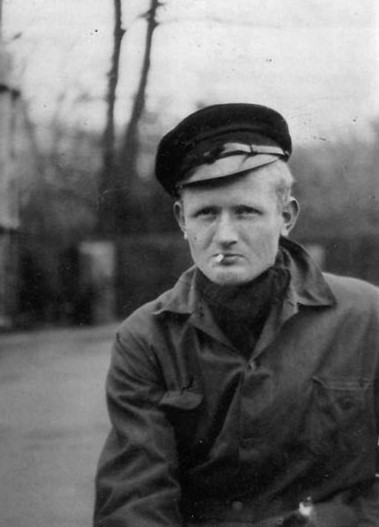 Bent Faurschou Hviid, who was born January 7, 1921, later became a member of the Danish resistance group Holger Danske during World War II. Because of his red hair, Hviid was nicknamed “Flammen,” which means “The Flame.” In 1951, he and his Resistance partner Jørgen Haagen Schmith, were posthumously awarded the United States Medal of Freedom by President Harry Truman. The Presidential Medal of Freedom is the highest civilian award of the United States, alongside the Congressional Gold Medal. The award is not limited to US citizens and, while it is a civilian award, it can also be awarded to military personnel and worn on the uniform.
If you were to ask the men who were a part of the Holger Danske, they would tell you that no other resistance member was as hated or sought after by the Germans as was Hviid. Leader of the Holger Danske from 1943 through 1945, Gunnar Dyrberg said in the 2003 Danish documentary film, “With a Right to Kill,” that no one knows exactly how many executions “The Flame” performed, but he was rumored to have killed 22 persons. In all, it is said that the Holger Danske carried out an estimated 400 executions…performed by the Resistance agents, but apparently no one man executed more than Hviid.
Hviid grew up during World War I and was 20 when the Germans occupied Denmark. He was not about to just sit back and let the Nazis take over his country…at least, not without a fight. He entered the Holger Danske resistance group in Copenhagen. He was assigned to kill Danish Nazi officials and collaborators…traitors, who in Hviid’s opinion, did not deserve to live.
“Flammen” often partnered with “Citronen” whose real name was Jørgen Haagen Schmith. “Citronen” means “the lemon.” Schmith got this nickname because he sabotaged a Citroën garage, destroying six German cars and a tank. Citronen usually drove for Flammen, who executed their given targets. The two men were the most famous resistance duo in Denmark during World War II. While they often worked together, the Germans put the highest bounty on Flammen’s head that they offered for any Resistance fighter, due to the Faurschou of Germans who were executed by Flammen.
On October 18, 1944, while Hviid was having dinner with his landlady and some other guests, someone knocked at the door. When the door was opened, a German officer demanded entry. Hviid, who was unarmed 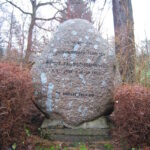 that evening, quickly went upstairs seeking to escape across the roof. When he reached the roof, he saw that the house was surrounded. Refusing to be taken alive, Hviid chewed a cyanide capsule and was dead a few seconds later.
The witnesses later told of how they could hear the German soldiers upstairs cheering at the sight of the corpse. For the Germans, the form of death that took “The Flammen” out made no difference to the German soldiers. All that mattered was that he was dead. The soldiers dragged Hviid downstairs feet first, repeatedly causing his head to bang against the stairs as they went. I suppose it was a show of disrespect or perhaps, triumph for them, although they did not cause his death really.
 The dynamic of the world wars was probably different than most other wars…especially when it came to which units and countries were fighting side by side or against each other. When Britain declared war against Germany in August 1914, Australia was automatically also at war, because it was part of the British Empire. The New Zealand government (also under the sovereignty of the British Empire) followed without hesitation despite its geographic isolation and small population. The British Empire is for most of us, a difficult to understand group of countries that while largely independent, is also part of a larger government…the British Empire. The British Empire is a worldwide system of dependencies—colonies, protectorates, and other territories, that over a span of some three centuries was brought under the sovereignty of the crown of Great Britain and the administration of the British government. The policy of granting or recognizing significant degrees of self-government by dependencies, which was favored by the far-flung nature of the empire, led to the development by the 20th century of the notion of a “British Commonwealth” that was comprised of largely self-governing dependencies that acknowledged an increasingly symbolic British sovereignty. The term was embodied in statute in 1931. Today the Commonwealth includes former elements of the British Empire in a free association of sovereign states. Now, I don’t claim to understand the inner workings of the British Empire or the British Commonwealth, but Australia and New Zealand apparently had the option to join Britain in the war or to stand back and remain neutral. Both nations were loyal and joined Great Britain.
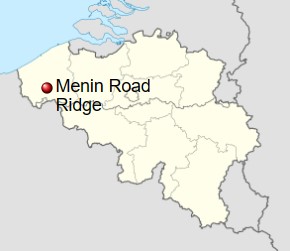
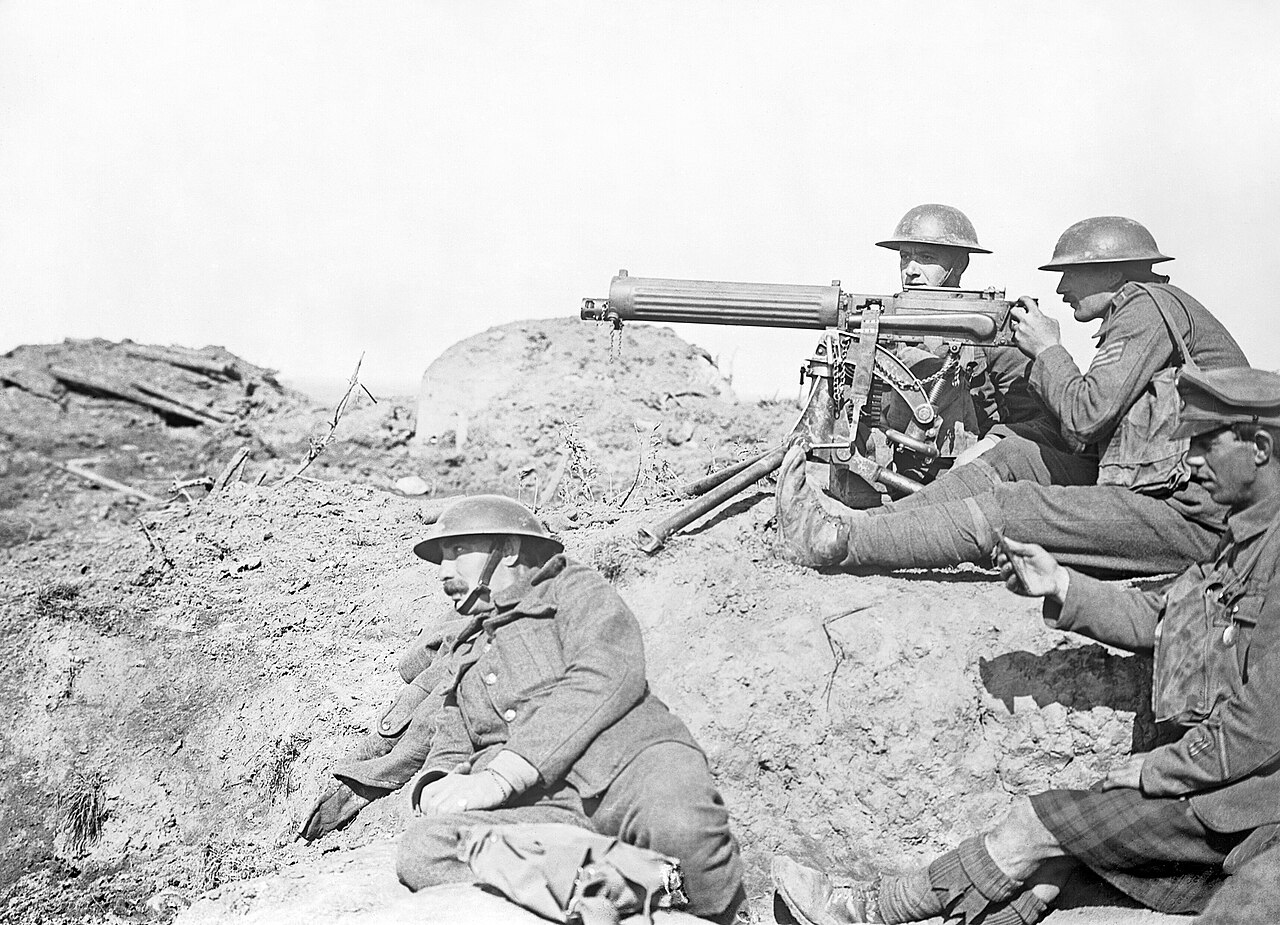
The Australian 6th Battalion was sent into warfare just two months after WWI began in August 1914. They met up with and joined the New Zealand Army, becoming the ANZAC (Australian and New Zealand Army Corps) from April 1915, while maintaining status as the Australian 6th Battalion until the unit was evacuated in December 1915. The Australian 6th Battalion fought German troops on the Western Front alongside the Allies. They were a good battalion, but for most of the time, there were no major decorations awarded…until. in September 1917, while serving in Belgium, Lieutenant Frederick Birks was awarded the only Victoria Cross ever granted within the unit. Sadly, Birks was killed in action the following day.
The Victoria Cross (VC) is “the highest and most prestigious decoration of the British honors system. It is awarded for valor ‘in the presence of the enemy’ to members of the British Armed Forces and may be awarded posthumously.” On September 17th, Birks’ battalion was moving parallel to a German line, with the orders to attack and capture the German line and blow them up. The men began moving toward their positions from Zillebeke on the night of September 18th, and immediately came under fire from gas shells. September 19th found the men holding their line, while the battalion prepared to attack the German line the next day. The battle that ensued became known as the Battle of Menin Road. Masked by a “light drizzle” of rain at 4am on 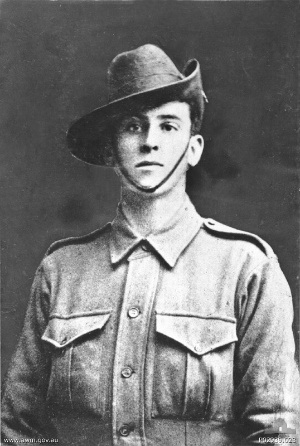 September 20th, the Germans sent barrages in front of and behind the battalion’s position. The battalion began their advanced at 5:40am. Birks and a corporal met the first German resistance and took two machine-gun positions, as another group of officers rushed a strong post. The Germans attacked the group with bombs, seriously wounding the corporal. Birks had to continue on alone. Birks advanced to the rear of the pillbox and forced the occupants to surrender. Birks went on to lead an attack a series of dugouts and pillboxes on the edge of Glencorse Wood, and fought against machine gun and bombs. He also assisted in the reorganization and consolidation of Australian men who had drifted away from their unit. September 21st brought more enemy shelling in response to the movement of Allied artillery. The shelling buried some men in Birks’ platoon. Birks attempted to dig the men out, “standing exposed” in the effort, another shell aimed at the C Coy post killed Birks, and four others, before he could save them. For his actions at Ypres, Birks was posthumously awarded the Victoria Cross, the announcement was made on November 8, 1917.
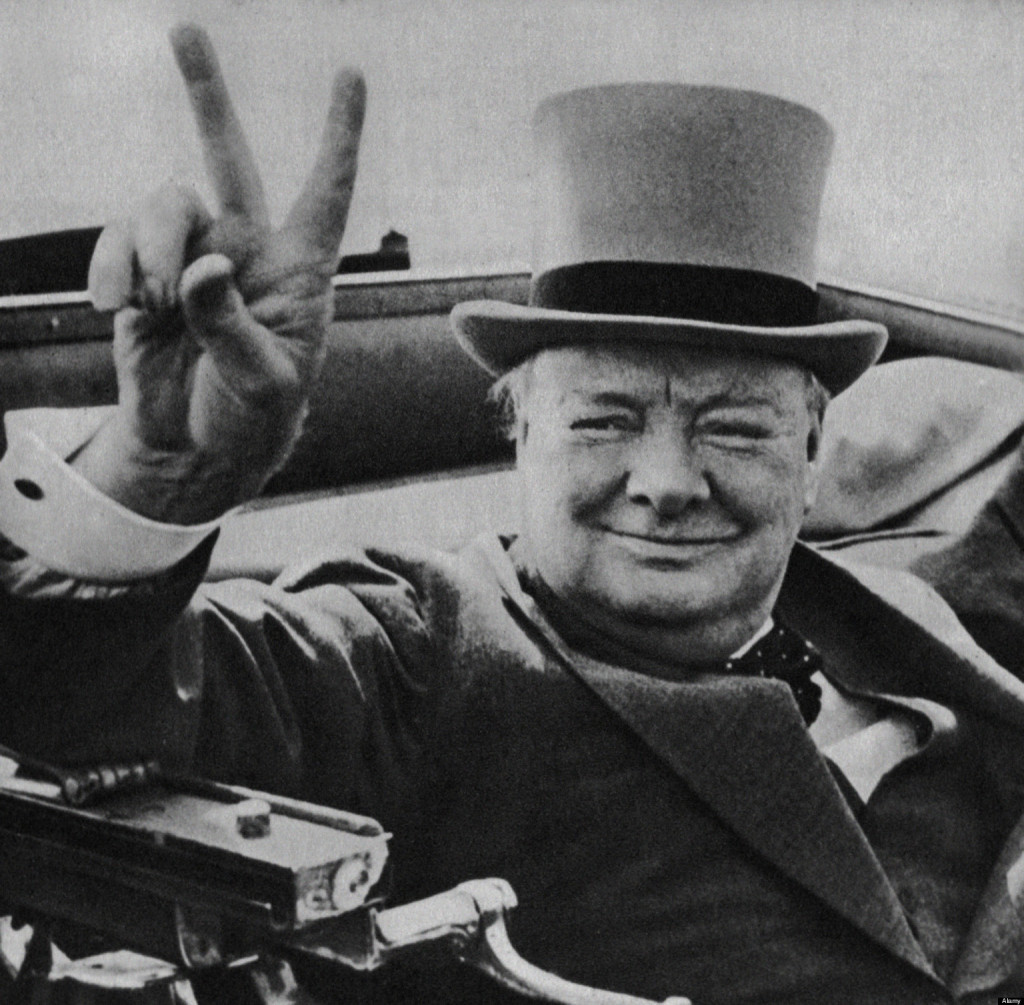 Many people today think of the “V” sign as meaning Peace, but in reality, the “V” sign used today was actually hijacked. The original “V” sign meant Victory, and it was originally presented as such by Winston Spencer-Churchill at a time when Britain is at one of its lowest points in World War II. Churchill is well known as one of the greatest motivators and speech makers of his time. On July 19, 1941, he launched the “V for Victory” campaign across Europe by telling those in Europe under Nazi control to use the letter “V” (for Victory) at every chance they got in speaking and writing. Churchill urged them to write a capital letter “V” to signify “V” for Victory. This was designed to let the Germans know they still had spirit and believed they would overcome Nazi Rule. The morale of the people was so important and this low point in history. When people give up hope, wars are lost…even before the battles are lost.
In this campaign, Churchill first gave a speech over the radio to tell the people of his plan. Immediately following his speech, the letter “V” began to appear everywhere. It was painted on walls, tapped out in Morse code on shop counters with knuckles or beer glasses or pencil stubs. It quickly became a rallying call across Europe that there was still hope. Many people weren’t aware, but this is also why Churchill’s most famous pictures from World War II always featured him giving the “V” for Victory Sign. He was continuously telling the people not to give up. That all was not lost, and Victory would still be theirs. We all know the “V” sign. Of course, it was made using the index and middle fingers, raised and parted to make a “V” shape while the other fingers are clenched.
These days, it can mean a number of things, and not all are good. When it is displayed with the palm inward 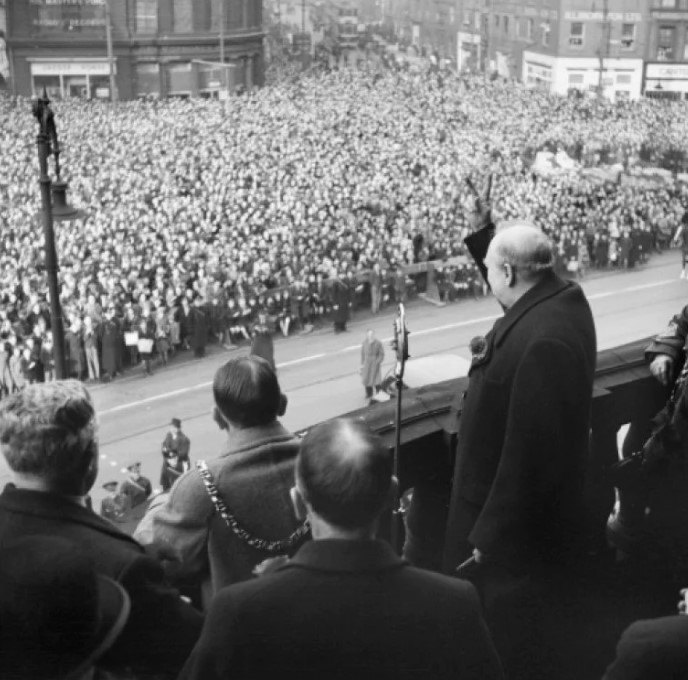 toward the signer, it can be an offensive gesture in some Commonwealth nations (similar to showing the middle finger). That usage dates back to at least 1900. When it is given with the palm outward, it is to be read as a victory sign (“V for Victory”). This usage was first introduced in January 1941 as part of a campaign by the Allies of World War II and made more widely known by Churchill the following July. As most of us know, during the Vietnam War, in the 1960s, the “V sign” with palm outward was widely adopted by the counterculture as a symbol of peace. These days, that is the most commonly used meaning and is commonly called the “peace sign.” Of course, most of us also know that it is used for fun in photographs, especially in East Asia and the United States, where the gesture is also associated with cuteness…the “rabbit ears.” That one is one I have never really figured out. Not what it is, but why people think it’s so funny. Oh well…to each his own.
 Today is a very important day. It is not about having a three-day weekend, a barbecue, picnic, or even a holiday camping trip. It’s not that these things are bad, or even wrong. It’s really just a matter of remembering and showing respect for those men and women who went to war and didn’t come home alive. Those men and women gave their all, their very lives to keep us and so many others around the world safe. They could have stayed home. There isn’t a draft anymore, although many were drafted, because in a war the likes of the world wars, and others, the men and women were dying so fast that the volunteers couldn’t keep up. So, they held a draft, and those men, because at that time women weren’t drafted, did their duty, and went to fight the war, many losing their lives in the process.
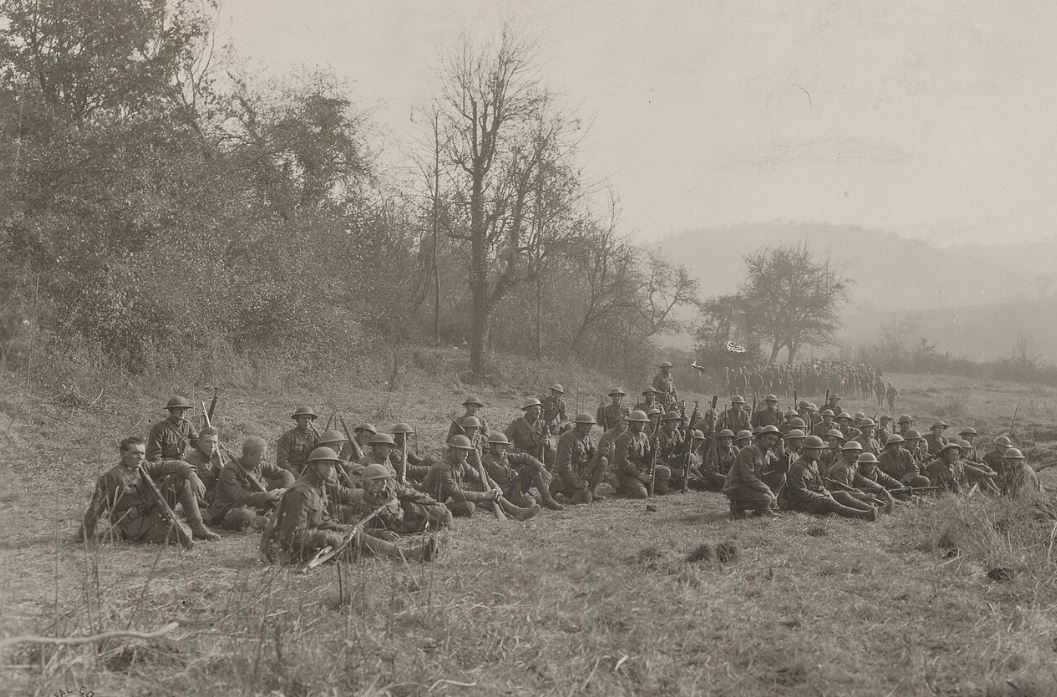
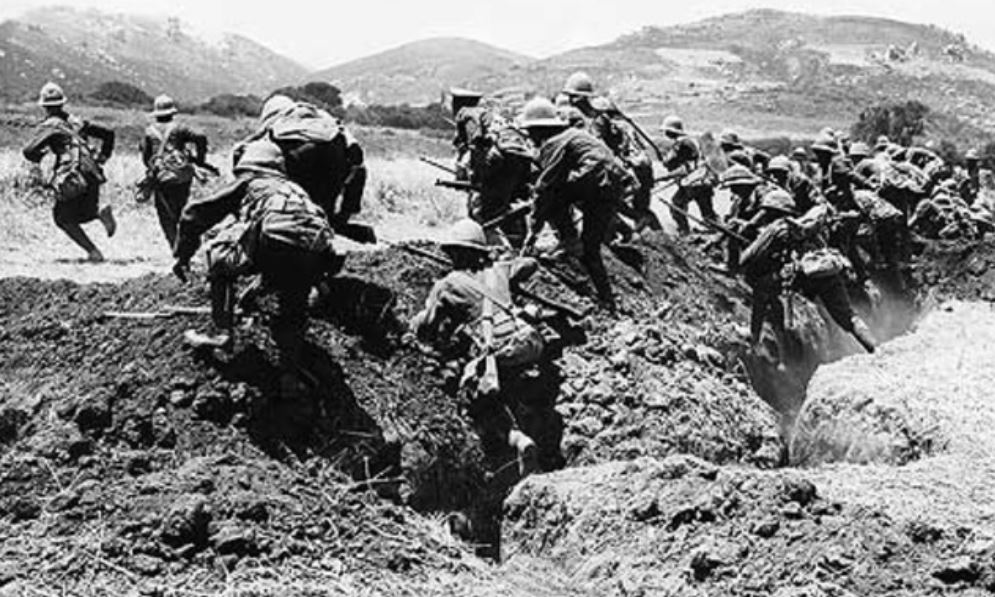
I happened to watch a movie the other night, called “The Lost Battalion.” It was a true event from World War I. It was called “The Lost Battalion” because of the heavy losses incurred by the nine companies of the US 77th Division of roughly 554 men, who were isolated by German forces during World War I after an American attack in the Argonne Forest in October 1918. Of the 554 men, roughly 197 were killed in action and approximately 150 missing or taken prisoner before the 194 remaining men were rescued. These men were not lost. The US Army knew where they were…pretty much, but they were lost, because it was expected that all would be lost, and that was almost the case. During the battle, the men had to leave the trenches and run, almost completely unprotected at the Germans entrenched on the other side of the hill. The battle was gruesome, and the movie was quite graphic. I’m sure many people would say that they shouldn’t have shown so much blood and mutilation, but if they “sugar coat” it, do we really understand how horrible war is?
The battalion was led by Major Charles W Whittlesey who survived the attack, but refused to be transported out ahead of his men, choosing instead to walk out with them. When the attack began in the Argonne, the 77th Division was under the belief that French forces were supporting their left flank and two American units including the 92nd Infantry Division were supporting their right. Within the 77th sector, some units, including Whittlesey’s 308th Infantry, were making significant headway, but unbeknownst to Whittlesey’s unit, the units to their left and right had been stalled, and actually retreated. Without this knowledge, the 77th Battalion moved beyond the rest of the Allied line and found themselves surrounded by German forces. As I watched the movie, my first thought was, why don’t they stay and fight from the trenches? Of course, I quickly realized that you can’t take the hill from the trench. These men had to dig deep within themselves, and leave the safety of the trench, knowing that they would most likely die right there, if the Allies were to have the victory. That is 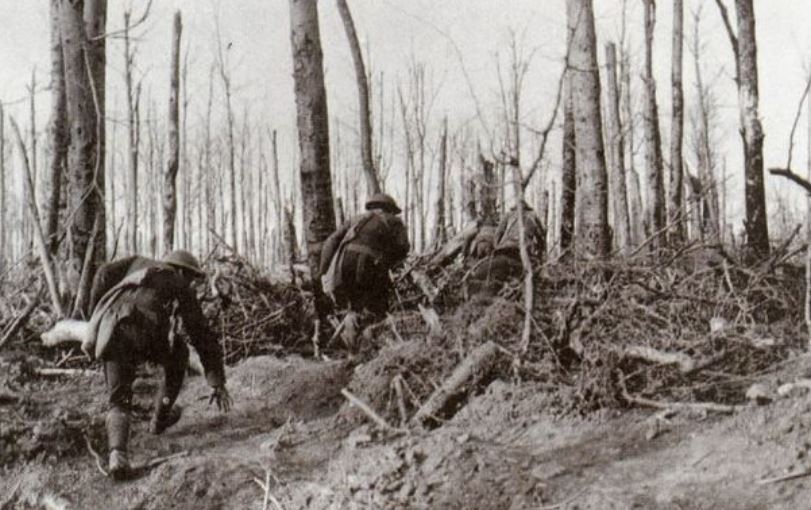
 giving your all!! That is what Memorial Day is really all about…the men and women who charged the enemy, accepting their fate of almost certain death, to win the war and protect our freedoms. These men and so many like them are the heroes of this day…a fact that we must never forget. I thank every fallen soldier this day, because you gave your all…selflessly and willingly, and you will never be forgotten!!
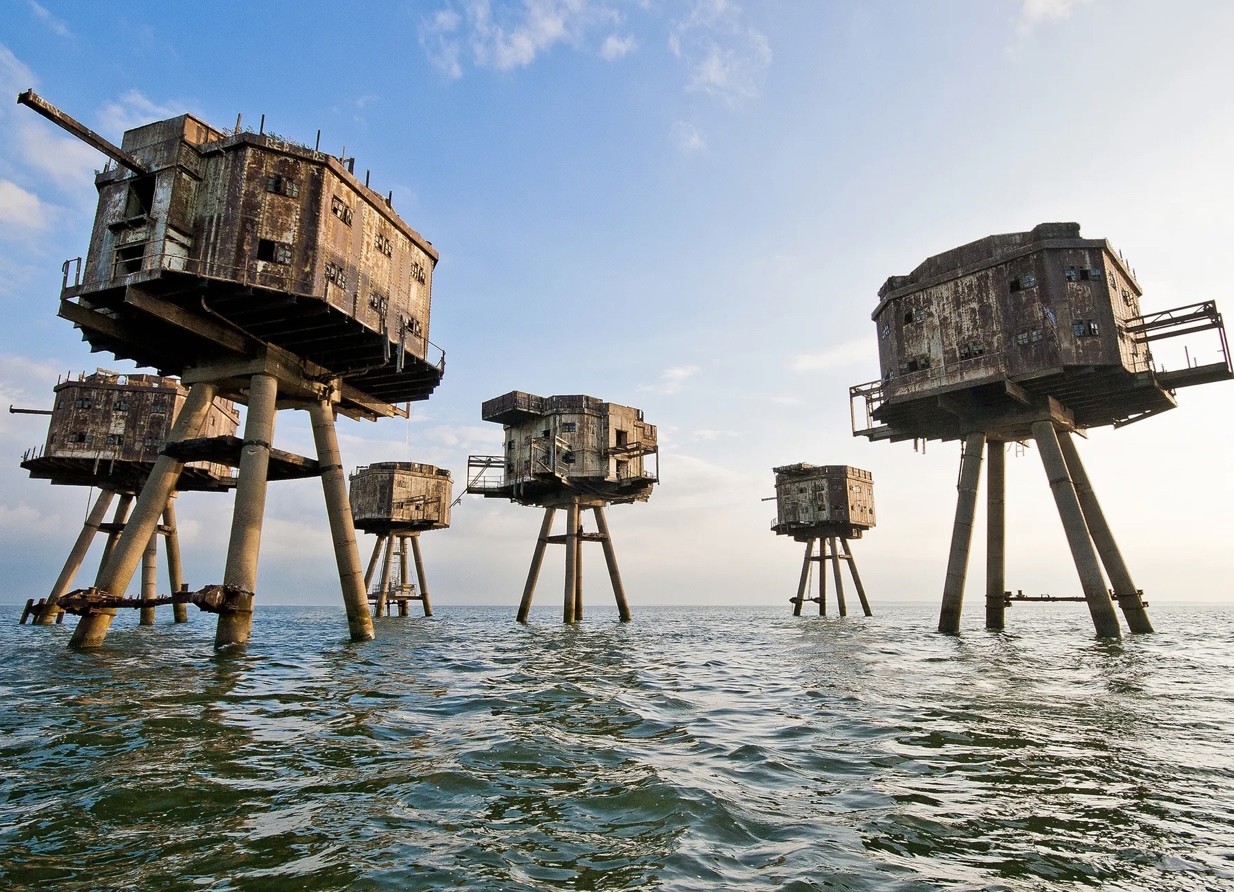 At the mouths of the Thames and Mersey rivers in the United Kingdom, you can still see what amounts to the remains of the Maunsell Forts. These forts are armed towers built during the Second World War to help defend the United Kingdom. At that time, they were operated as army and navy forts. They were named after their designer, Guy Maunsell. When the war ended, so did the need for the forts, and they were decommissioned in the late 1950s. They weren’t torn down, however, and were later used for other activities, including pirate radio broadcasting. Later it was found that they were not really stable enough for use, and the broadcasting stopped.
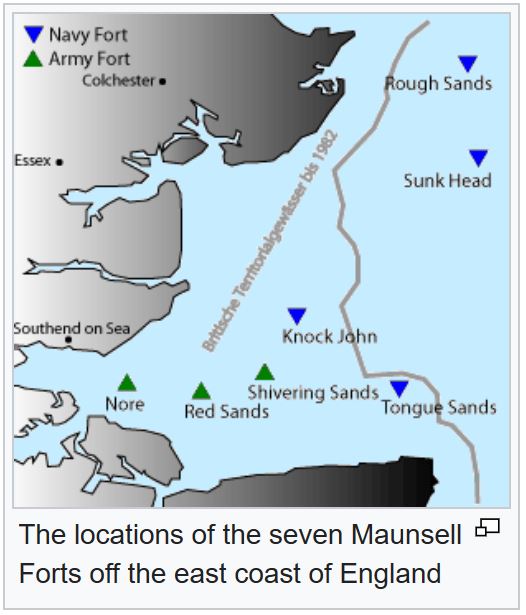
The Maunsell naval forts were built in the mouth of the Thames and operated by the Royal Navy. Their purpose was to deter and report German air raids following the Thames as a landmark and prevent attempts to lay mines by aircraft in this important shipping channel. There were four naval forts: 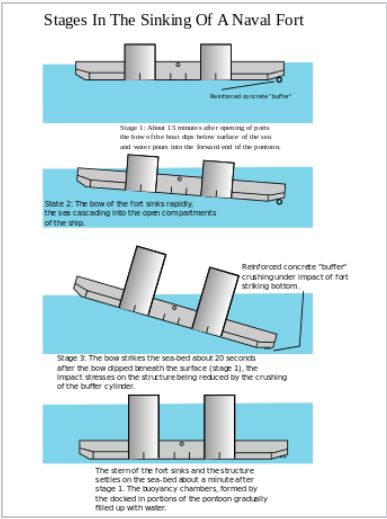 Rough Sands (HM Fort Roughs) (U1), Sunk Head (U2), Tongue Sands (U3), Knock John (U4). In reality it was an artificial naval installation, and it is similar in some respects to early “fixed” offshore oil platforms. “Each fort consisted of a rectangular 168-by-88-foot reinforced concrete pontoon base with a support superstructure of two 60-foot tall, 24-foot diameter hollow reinforced concrete towers. The walls were roughly 3.5 inches thick. The overall weight of each fort is estimated to have been approximately 4,500 tons. Everything was a useful space. The twin concrete supporting towers were actually divided into seven floors. Four of the floors were used for crew quarters. The rest of the floors were used for dining, operational, and storage areas for several generators, and for freshwater tanks and anti-aircraft munitions. There was a steel framework at one end supporting a landing jetty and crane which was used to hoist supplies aboard. The wooden landing stage itself became known as a ‘dolphin.'” A dolphin is “a group of pilings arrayed together to serve variously as a protective hardpoint along a dock, in a waterway, or along a shore; as a means or point of stabilization of a dock, bridge, or similar structure; as a mooring point; and as a base for navigational aids.”
“The towers were joined together above the waterline by a steel platform deck. Other structures could be added as needed. That area was also the gun deck, on which an upper deck and a central tower unit were constructed. QF 3.7 anti-aircraft guns were positioned at each end of this main deck, and two Bofors 40 mm anti-aircraft guns and the central tower radar installations atop a central living area that contained a galley, medical, and officers’ quarters. The design of these concrete structures is equal to a military grade bunker, due to the ends of the stilts, (under water) that are solidly locked into the ground. They were laid down in dry dock and assembled as complete units. They were then fitted out, and the crews went on board at the same time for familiarization, before being towed out and sunk onto their sand bank positions in 1942.” They also had some unexpected uses. Many species of fish live near the forts because the forts create cover…who would have thought about that. The forts have also provided landmark references for shipping…an added perk.
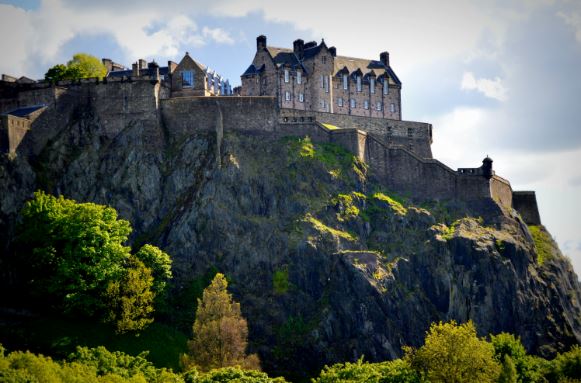 In what reality is an “invisible” army a thing…much less important? Well, the answer is…in World War II. During that war, in which battles were being fought against multiple enemy nations, of multiple fronts, the British needed a little unusual help with the different fronts. In actuality, no British Fourth Army ever took the field. That didn’t mean that they weren’t very effective in their work. but they existed as part of the deception plans Operation Cockade and the later Operation Fortitude North. During these operations, the Germans were encouraged to believe that a Fourth Army had been established with its headquarters in Edinburgh Castle, and that it was preparing to invade Norway. Britain’s “Fourth Army” was successful in drawing and keeping the German units away from the real invasion zone in Normandy. Then, in the subsequent ‘Fortitude South’ the Fourth Army with different units was presented as part of the fictitious First United States Army Group (FUSAG) in its threat to the Pas de Calais.
The Fourth Army was always a “fictitious field army.” It first came into being as part of the British Expeditionary Force during the World War I. It was actually formed on February 5, 1916, under the command of General Sir Henry Rawlinson. The plan was for this fictitious army to carry out the main British contribution to the Battle of 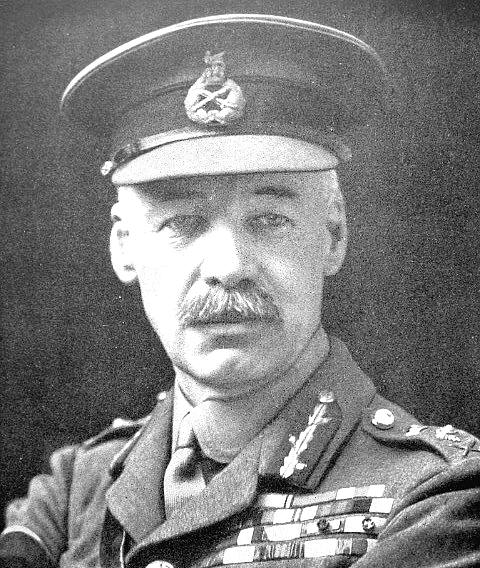 the Somme, but they quickly saw how effective a rumor could be in a war situation, and that is truly what this was. Basically, the word is sent out that a huge army is blocking a front that the enemy is trying to reach, or that they are planning to attack the enemy on a different front. So, the enemy decides to take another route…often a longer route, or in response to the rumored attack, the enemy sends it troops to the wrong place all together…only to find out they have been duped.
It must have been awful to take the troops into what is expected to be a battle, only to find out that they had been fooled. Imagine how that would make you look to your troops. The intel was completely false, and they fell for it. That must have made they feel very stupid on top of the fact that they wasted a lot of time on an imaginary enemy. While the Germans, in this case, looked incredibly stupid, it made the British Army look quite wise. Who would have thought that “make believe” could be such an effective weapon of warfare?
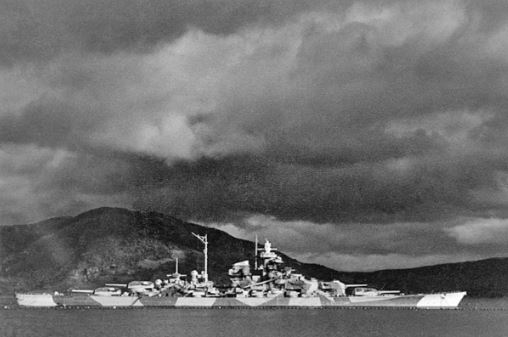 While many people have heard about the sinking of the German ship, The Bismarck, many may not have known that the Bismarck had a sister ship called the Tirpitz. Both ships were quite likely the same level of severity of threat to the war effort, but the Tirpitz somehow didn’t stand out as much…possibly because of the song that was written called “Sink the Bismarck” by Johnny Horton, and the fact that the Bismarck sank the Royal Navy battleship, HMS Hood, and that was the sinking than was the first and last straw before the Bismarck was taken down.
Nevertheless, the Tirpitz, commissioned in 1941, posed a grave threat to Allied shipping too. The Tirpitz was the German Navy’s mighty 42,900-ton battleship that carried a main armament of eight 15-inch guns. The ship saw limited action, however, spending most of its war career in Norwegian waters where it posed a constant danger to Allied convoys that were bound for Russia. Because the ship was in those waters, the Allies were forced to maintain a large fleet in northern waters to guard against the Tirpitz and repeated attempts were made by both the Royal Air Force and Royal Navy to sink the menacing ship. During the short life of the Bismarck, the battleship sank one ship…HMS Hood, and then the Royal Navy took the ship down. The Tirpitz was a menace a bit longer, but it never actually sank a ship. It took part in a number of battles, mostly shoot at other ships, but sinking none. Still, the possibility was always there that the Tirpitz could take out ships belonging to the Allies.
The Royal Air Force tried to take out the Tirpitz before it even set sail, by bombing it in January of 1941 while it 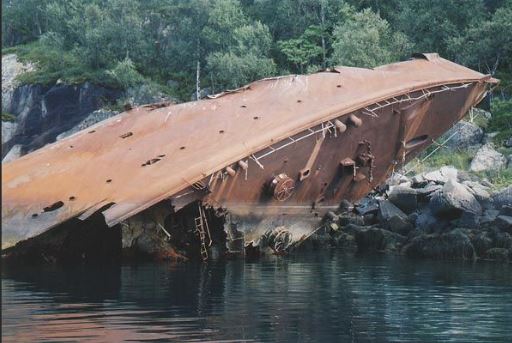 was being completed in a Wilhelmshaven dry dock. Somehow, the bombs actually “straddled” the battleship, missing it, and doing very little damage. Tirpitz was attacked again later in 1941 by twin engined bombers and in April 1942, when it was located and attacked by Halifaxes and Lancasters. Unfortunately, no bombs found their target that time either. The Royal Navy also attempted to take down the ship on a number of occasions with miniature submarines and carrier-based aircraft. Those attacks hit their mark, but had little effect, because Tirpitz had a double layer of armor plating. Finally, British inventor, Sir Barnes Wallis, built a special bomb for the job. He had previously developed the bouncing bomb used in the Dambusters Raid, so his inventions were trusted. In 1944 he devised the “Tallboy,” a 12,030-pound weapon capable of piercing the Tirpitz’s armor plating.
The ship was doomed, and on November 12, 1944, thirty Lancasters took off from Scotland flying in clear weather flew at 1,000 feet to avoid early detection by enemy radar prior to rendezvousing at a lake 100 miles southeast of Tromso. The attacking force then climbed to bombing height of between 12,000 and 16,000 feet. The Tirpitz was sighted from about 20 miles away. The crew called for air cover…frantically, but no cover came. They were sitting ducks when the Lancasters passed over the last mountain and the fjord with the Tirpitz came into view. When the bombers were about 13 miles away, the Tirpitz began firing their anti-aircraft guns. They 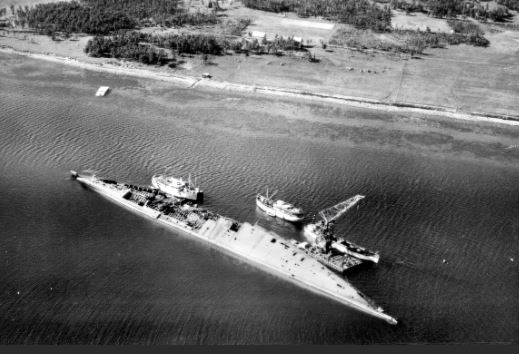 were joined by shore batteries and two flak ships. It was not enough. The Lancasters released their bombs were released and waited thirty long seconds for the results. The first bombs narrowly missed the target, but then a great yellow flash burst on the foredeck and the Tirpitz was seen to tremble as it was hit by at least two Tallboys. Smoke shot up to about 300 feet and the ship had started to list badly. Then a tremendous explosion was heard as the ammunition stores magazine went up. The ship rolled over to port and capsized. After 10 minutes only the hull visible from the air. Approximately 1000 of her crew were killed. The attacking aircraft, all with only minimal damaged returned safely to base. The Tirpitz was gone…finally.
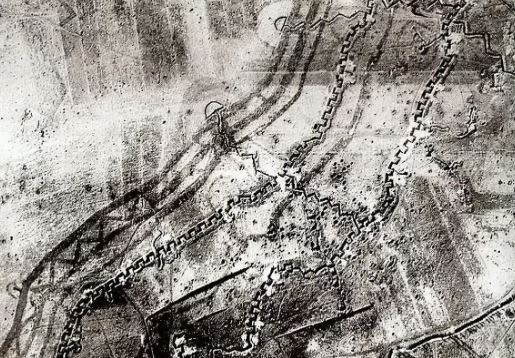
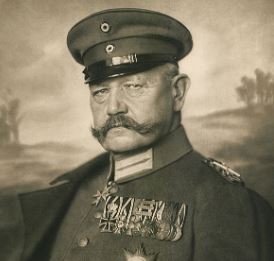 As World War I…the “War to end all Wars,” was coming to a close, there still remained one serious German stronghold that had to be taken down in order to ensure Allied success in winning the war. That stronghold, known to the Allies as the Hindenburg Line, an area they named after the German commander in chief, Paul von Hindenburg, was built in late 1916. The Germans called it the Siegfried Line. Either was, the Hindenburg Line was a heavily fortified zone running several miles behind the active front between the north coast of France and Verdun, near the border of France and Belgium. This area was a must win, must take back line, if the Allies were going to win the war.
The German army was working hard to make it very difficult to break through the Hindenburg line by September 1918. At that time, the German line consisted of six defensive lines. The zone formed by these six lines measured some 6,000 yards deep, and it was ribbed with lengths of barbed wire and dotted with concrete emplacements to be used as firing positions. It was a fortress that the Germans were sure would be impenetrable. However, while the Hindenburg Line was heavily fortified, it was not without weakness. Its southern part was most vulnerable to attack, because it included the Saint Quentin Canal, and the entire area was not totally out of sight of artillery observation by the enemy. Any attack by the Allies would need to come through this weakness. Another weakness was that the whole system was laid out linearly, as opposed to newer constructions that had adapted to more recent developments in firepower and were built with scattered “strong points” laid out like a checkerboard to enhance the intensity of artillery fire. These things would be the saving grace for the Allies, and the downfall for the Germans.
Knowing these vulnerabilities, the Allies began to concentrate all the force built up during their so-called “Hundred Days Offensive,” to their advantage. The operation kicked off on August 8, 1918, and by late September, the Allies had gained a decisive victory at Amiens, France, against the Hindenburg Line. Australian, British, French, and American forces participated in the attack on the Hindenburg Line. The attack began with a huge bombardment, using 1,637 guns along a 10,000-yard-long front. The final 24 hours of the offensive saw the British firing a record 945,052 shells. After capturing the Saint Quentin Canal with a creeping barrage of fire…126 shells for each 500 yards of German trench over an eight-hour period, the Allies successfully breached the Hindenburg Line on September 29, 1918.
The attack was pushed forward by Australian and United States troops, who, out of a must-win sense of urgency, attacked the heavily fortified town of Bellicourt with tanks and aircraft. The battle raged on for four days, with heavy losses on both sides. Finally, the Germans were forced to retreat. With Kaiser Wilhelm II 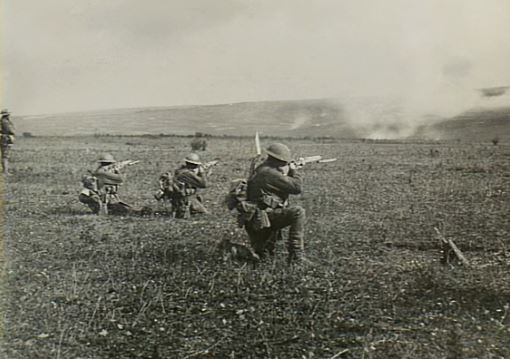
 pressured by the military into accepting governmental reform and Germany’s ally, Bulgaria, suing for an armistice by the end of September, the Central Powers were in disarray on the battlefield, as well as the home front. The Allies continued to press their advantage on the Western Front throughout the month of October, and against their predictions, World War I came to an almost abrupt end on November 11, 1918.
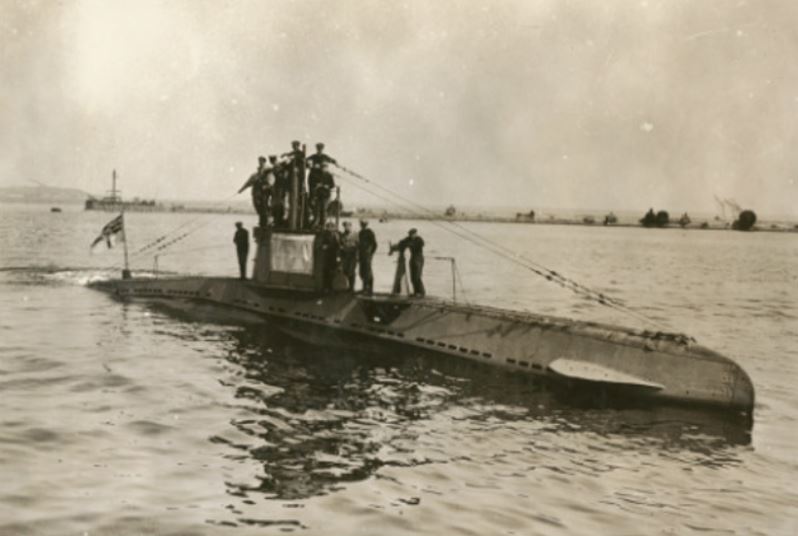 When a nation has a weapon that is so deadly to its enemy nations, those nations have no choice but to find a new way to beat that weapon. The German U-Boat was just such a weapon. Gliding along silently beneath the sea, the U-Boat put the ships of the Allied nations in constant and grave danger. That was one of the reasons that the British developed a fixation on their presence at sea. They depended on seaborne trade, and during World War I, the Germans were terrorizing that trade.
For much of Great Britain’s history, they enjoyed the luxury of having more battleships than the next two powers combined. For that reason, the Germans knew that they would have to concentrate their efforts on attacking vulnerable shipping lanes to disrupt the British war effort. They didn’t care if there were passengers on those ships. They didn’t care about loss of life or supplies. They had one plan…to dominate the seas. German submarines became a menace to the merchant navy. Something had to change, so the British came up with a plan to counter the U-boat threat. The plan involved disguising armed vessels as harmless trawlers to 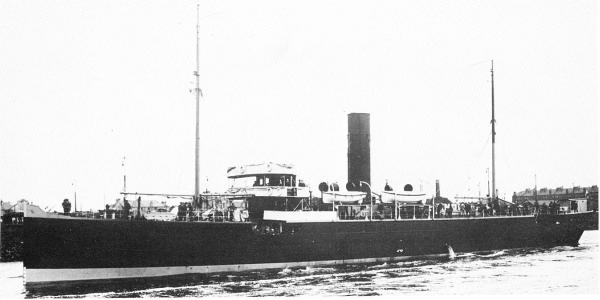 lure the submarines in and then wipe them out. The answer to the U-boat were disguised vessels…decoys, known as Q-ships.
Knowing that the U-Boats were under orders to attack just about anything. The Q-ships hid naval guns behind pivoting panels. It was the Sun Tzu tenet of “hold out baits to entice the enemy.” The Q-ships pretended to be disabled and when the U-Boats show up for the kill, the Q-ships went into action. Guns and additional crew had been concealed by hinges that could be dropped at a moment’s notice. The U-boats of World War I had limited range and carrying capacity, so the captains were nervous about wasting their torpedoes. Also, while the U-Boats of World War II were more capable of lang periods of time submerged, the U-Boats of World War I, had limited capability, so they preferred to use the submarine’s main gun to subdue ships whenever possible.
As the U-Boats came into sight of the Q-ship, the Q-ship’s crew would pretend to panic and abandon the ship to 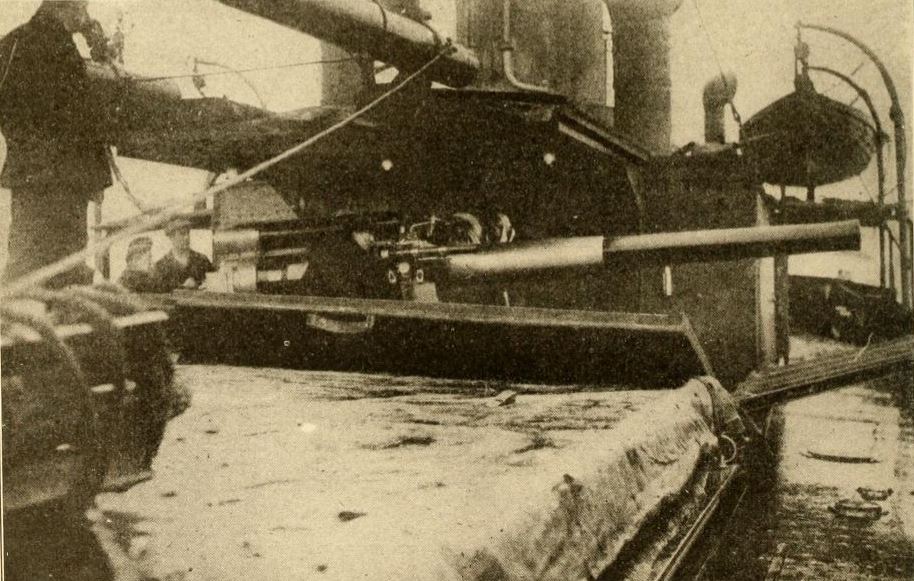 draw the submarine in close. The U-Boats, once lured in, were at the mercy of the Q-ships. The Q-ships began to drop their depth charges as soon as the submarine tried to escape. It was a dangerous game to play and required a brave crew to pull off the ruse, and it was not always successful. Some Q-ships were lost, but because of their efforts the threat of submarines in World War I were lessened. The plan was to try the tactic again in World War II, but ships were in very short supply. The tactic of using decoy ships was much more limited but was also used by the Germans and Americans. While it wasn’t a major tactical warfare practice during the two wars, it was effective while it was used.

